
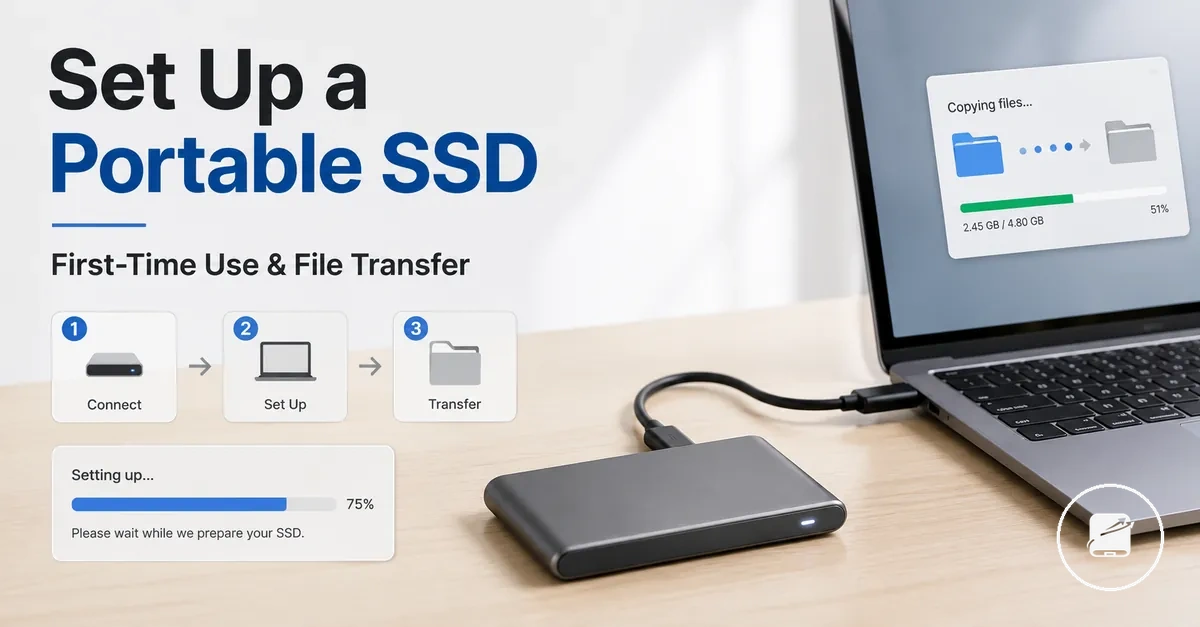
Portable SSD First-Time Setup
A portable SSD first-time setup begins when you connect the drive to a suitable port with the correct cable and confirm that the computer recognises it. The normal setup path is to connect the drive, check recognition, prepare it if needed, complete the file transfer, eject it safely, and store it securely.
On Windows, a recognised portable SSD normally appears in File Explorer, while on macOS it normally appears in Finder.
On Windows, a recognised portable SSD normally appears in File Explorer, while on macOS it normally appears in Finder. Recognition can fail when the cable or port does not support the required connection, and a new or previously used drive may need formatting when its current file system is unreadable or not writable on that operating system.
Check the cable, port, recognition status, and drive condition before moving from setup framing into the detailed readiness checks.
A portable SSD that does not appear is not ready for file transfer, and disconnecting it while data is being written creates a data-safety risk. Check the cable, port, recognition status, and drive condition before moving from setup framing into the detailed readiness checks.
Table of Contents
Before Connecting a Portable SSD
Before connecting a portable SSD, verify that the cable, port, adapter, and power conditions match the device you intend to use. Portable SSDs are external storage devices that require a supported data connection, so complete these checks before connecting the drive.
For a laptop, desktop, tablet, Windows PC, or Mac, the available port and cable type determine how the drive can be connected.
For a laptop, desktop, tablet, Windows PC, or Mac, the available port and cable type determine how the drive can be connected. Use these compatibility checks to confirm the connection path shown in the readiness image before following the setup checklist.
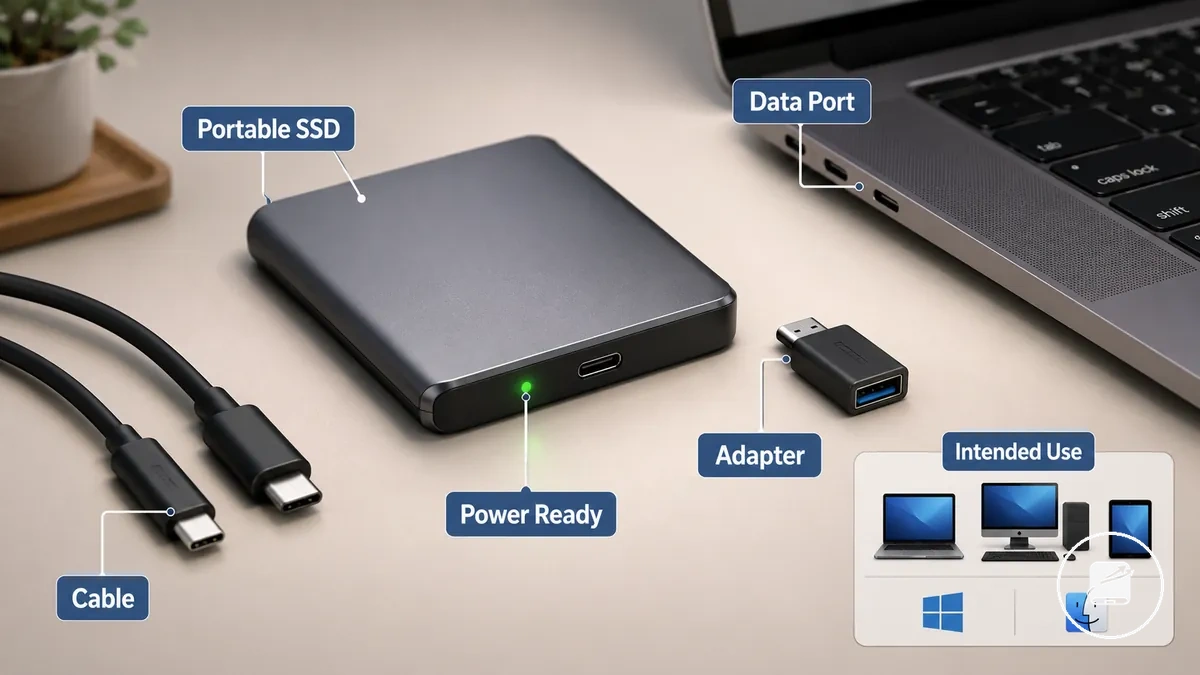
- Cable: Match the cable connector to both the portable SSD and the device; a connector that does not fit either end cannot complete the connection.
- Port: Select a port that supports data transfer; a charging-only port can supply power without making the drive available for file access.
- Adapter: Use an adapter only when its connectors match the cable and device port and it supports data transfer; otherwise, the portable SSD may receive power without being recognised.
- Device state: Keep the laptop, desktop, or tablet powered on and awake so the operating system can detect the portable SSD.
- Power: Confirm that the selected connection supplies the power required by the portable SSD or by any adapter in the connection path.
- Intended use: Identify whether the drive will be used with Windows, Mac, a tablet, or more than one system because that choice affects later formatting and file-access decisions.
If the device documentation does not confirm data transfer through the selected port, support for the adapter, or use of external storage, check those device-specific conditions before plugging in the portable SSD.
Cable, port, and adapter readiness
A portable SSD is compatible for setup when the cable connector, computer port, and any adapter match and support data transfer. Check cable-to-port fit before connecting because a mismatched connector, unsuitable adapter, or damaged cable can prevent recognition or create a transfer limit.
The annotated image highlights the connection parts that affect recognition and transfer capability before setup continues.
The annotated image highlights the connection parts that affect recognition and transfer capability before setup continues.
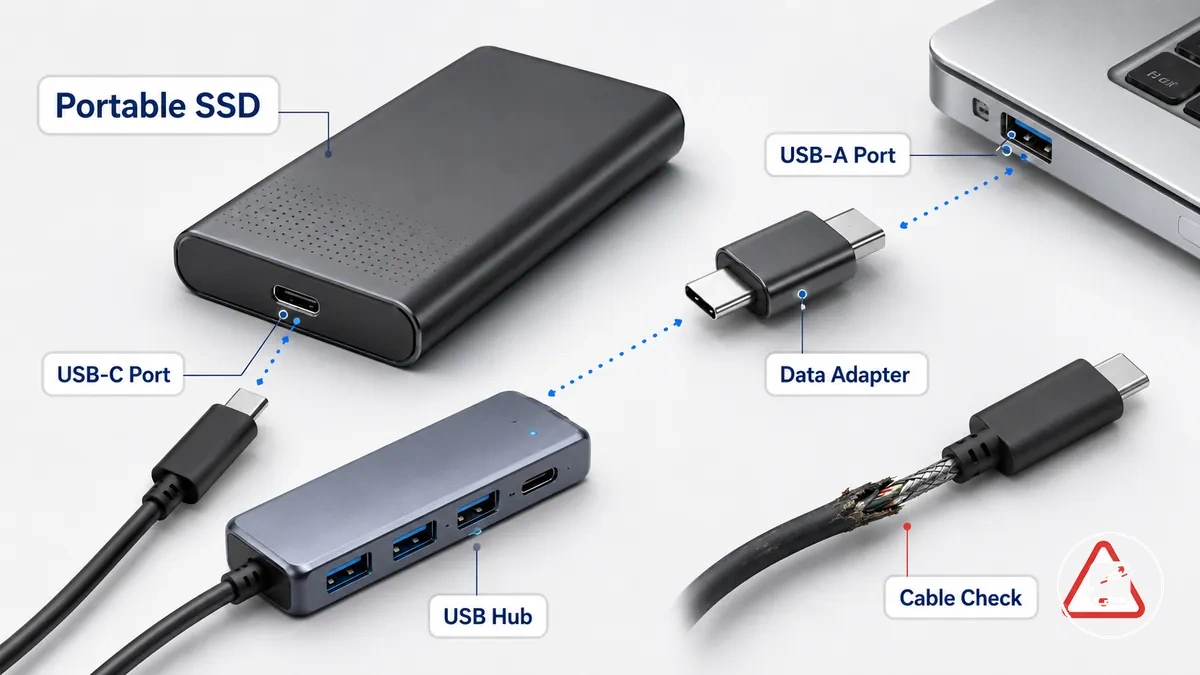
- Correct fit: Connect a USB-C portable SSD to a USB-C port, or use a USB-C-to-USB-A adapter or cable that supports data transfer when the computer only provides USB-A ports.
- Questionable fit: A charge-only or damaged cable can supply power without allowing the operating system to recognise the portable SSD or complete normal file transfers.
- Adapter: Match the adapter to both connector types and use one intended for data transfer; otherwise, the connection can fail even when the plugs fit physically.
- Hub: A USB hub can enable the connection, but an underpowered or incompatible hub can interrupt recognition or reduce the available transfer capability.
- Avoidable risk: Inspect the cable and connector for bent pins, loose fittings, or visible damage before first use because physical wear increases the chance of connection failure.
For example, if a USB-C external SSD is connected to a desktop computer that only has USB-A ports, a USB-C-to-USB-A data adapter or cable can allow the initial setup to proceed, while the connection remains limited by the capabilities of the available USB-A port.
Device and power conditions
A portable SSD is more likely to be recognised when the device is powered on, the operating system is active, and an available data-capable port is ready for use. Before connecting the drive, confirm the computer is awake because device state is the local condition that most directly affects first recognition.
The annotated image shows the device state conditions to verify before connecting the portable SSD.
The annotated image shows the device state conditions to verify before connecting the portable SSD.
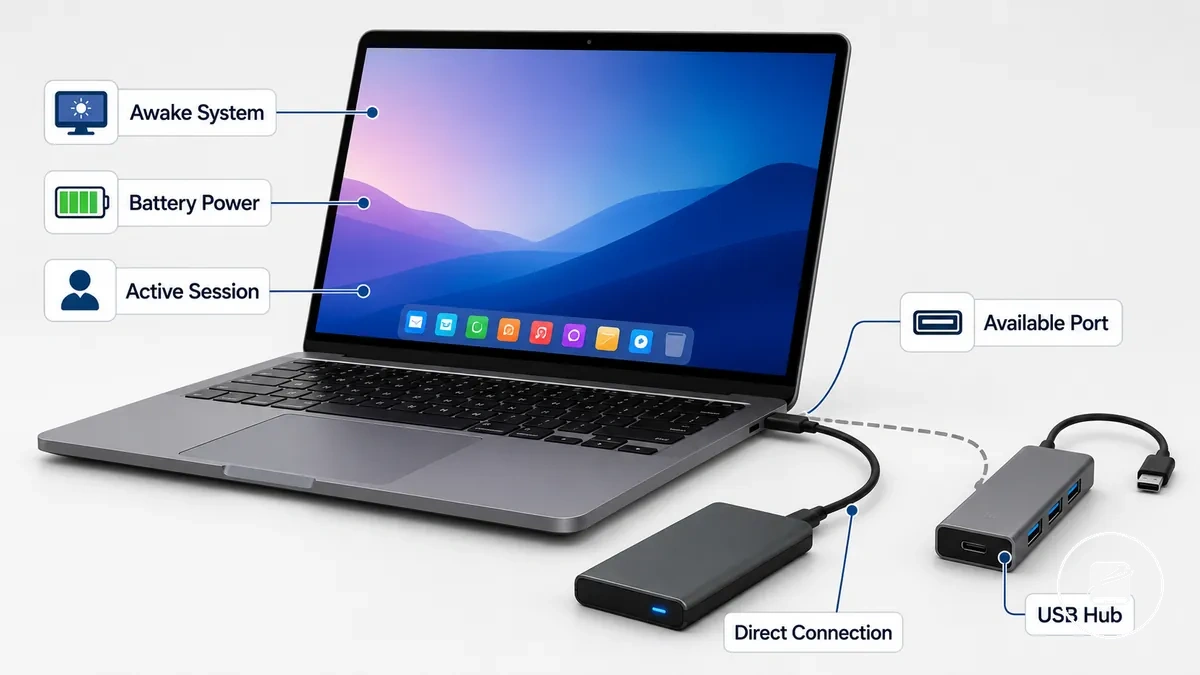
A direct connection helps isolate device-state conditions by removing a hub from the initial setup path. An underpowered hub can contribute to intermittent detection because it may not provide stable power or communication, while a direct connection removes that variable without implying the hub is always the cause.
- Sleep mode: Wake the device fully before connecting because recognition may be delayed while the operating system resumes normal activity.
- Battery: If a laptop or tablet has a low battery, connect external power or charge the device first because reduced available power can contribute to unstable recognition.
- Locked screen: Sign in to the current operating system session so storage devices can be recognised normally after connection.
- Hub: If detection is inconsistent through a hub, connect the portable SSD directly to an available port to determine whether the hub is contributing to intermittent recognition.
- Available port: Use an available data-capable port because a stable direct connection gives the operating system the best opportunity to recognise the portable SSD.
For example, a laptop that has just resumed from sleep may not recognise a portable SSD connected through a weak hub immediately. Reconnecting the drive directly after the operating system is fully awake can help determine whether device state or hub conditions are affecting the initial connection.
Connecting the Portable SSD to a Computer
Connect the portable SSD directly to your computer before formatting, transferring files, or troubleshooting. A secure cable connection and successful drive recognition indicate that the physical setup is complete and ready for the next setup step.
The image below demonstrates the correct physical connection sequence and the initial recognition check.
The image below demonstrates the correct physical connection sequence and the initial recognition check. It shows the portable SSD, cable, computer port, and the expected on-screen recognition cue before continuing with setup.
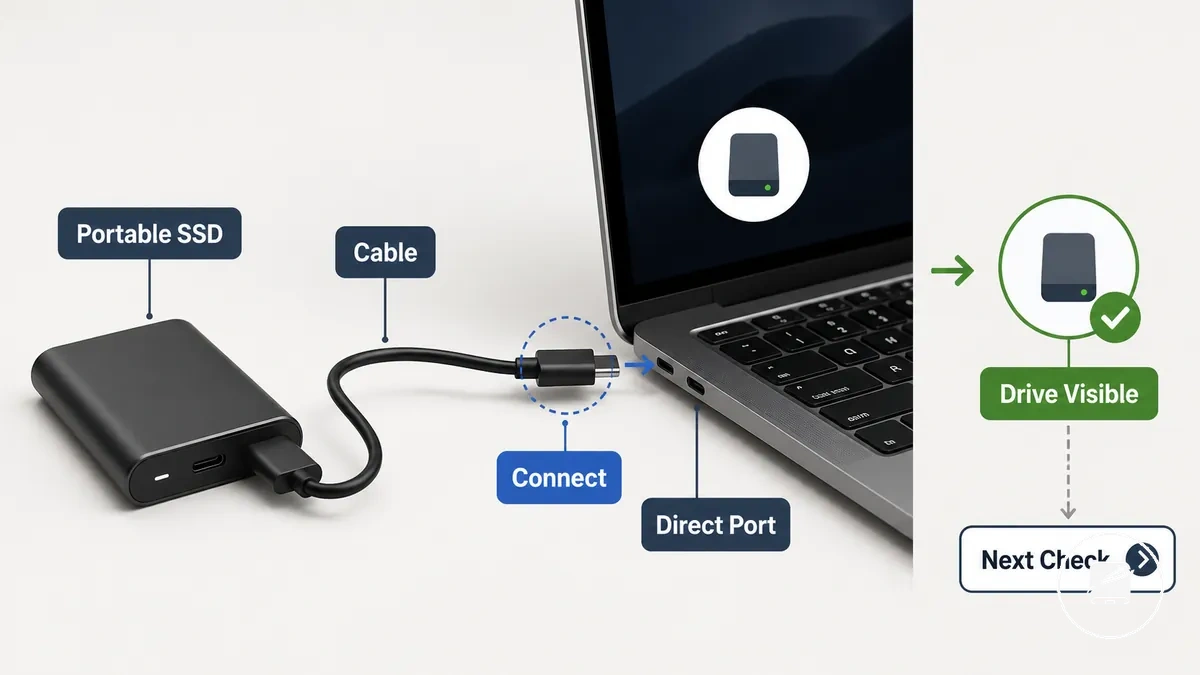
After connecting the portable SSD, Windows may display a device notification and list the drive in File Explorer. On macOS, the drive may appear in Finder, or in Disk Utility if it has not yet mounted, before you continue with formatting or file transfers.
- Connect the portable SSD. Plug the cable firmly into both the portable SSD and a direct port on the computer. Visible sign: The cable fits securely. Next check: Confirm both ends of the cable are fully inserted.
- Use a direct port. Connect the portable SSD to a direct USB port rather than through additional accessories during the first connection. Visible sign: The operating system starts checking the device. Next check: Wait for a notification or an updated drive list.
- Confirm operating system recognition. In Windows, look for a notification and check File Explorer. In macOS, check Finder first and then Disk Utility if the drive is not immediately visible. Visible sign: The portable SSD appears as a drive or mounted volume. Next check: Verify the drive is accessible.
- Verify drive visibility. If the drive appears normally, the physical connection is complete. Visible sign: The drive is ready to open. Next check: Continue with formatting only if your intended workflow requires it.
- Pause before further troubleshooting. If no notification or drive visibility appears after the initial connection, recheck the cable fit and direct port before proceeding. Visible sign: The drive still does not appear after the basic connection check. Next check: Continue with the next setup verification instead of advanced operating system repair procedures.
For example, if Windows displays a new-device notification and the portable SSD appears in File Explorer, or if the drive appears in Finder on macOS, the initial connection has been confirmed and you can proceed with the next setup stage.
Confirming the drive appears in Windows or macOS
Confirm that the connected portable SSD appears in your operating system before changing any settings. A recognized drive is ready for the next setup step, an uninitialized drive has been detected but requires initialization before normal use, and a not visible drive should first be treated as a basic connection issue rather than an advanced troubleshooting case.
Use the comparison below to identify the drive's current status before continuing with setup.
Use the comparison below to identify the drive's current status before continuing with setup.
| Platform | Where to check |
|---|---|
| Windows | Open File Explorer to check whether the portable SSD appears in the drive listing. If it does not appear there, open Disk Management. A drive listed as uninitialized is recognized by Windows but is not yet prepared for file storage. |
| macOS | Open Finder to check whether the portable SSD appears as a mounted volume. If it is not listed, open Disk Utility to determine whether the drive is recognized but not mounted or still requires initialization. |
For example, if the portable SSD does not appear in File Explorer but is listed in Disk Management as uninitialized, Windows has detected the device even though it is not ready for normal use. If the drive remains not visible in File Explorer and Disk Management on Windows, or in Finder and Disk Utility on macOS after basic cable and direct-port checks, continue with the next setup verification instead of assuming permanent failure.
Preparing the Drive for First Use
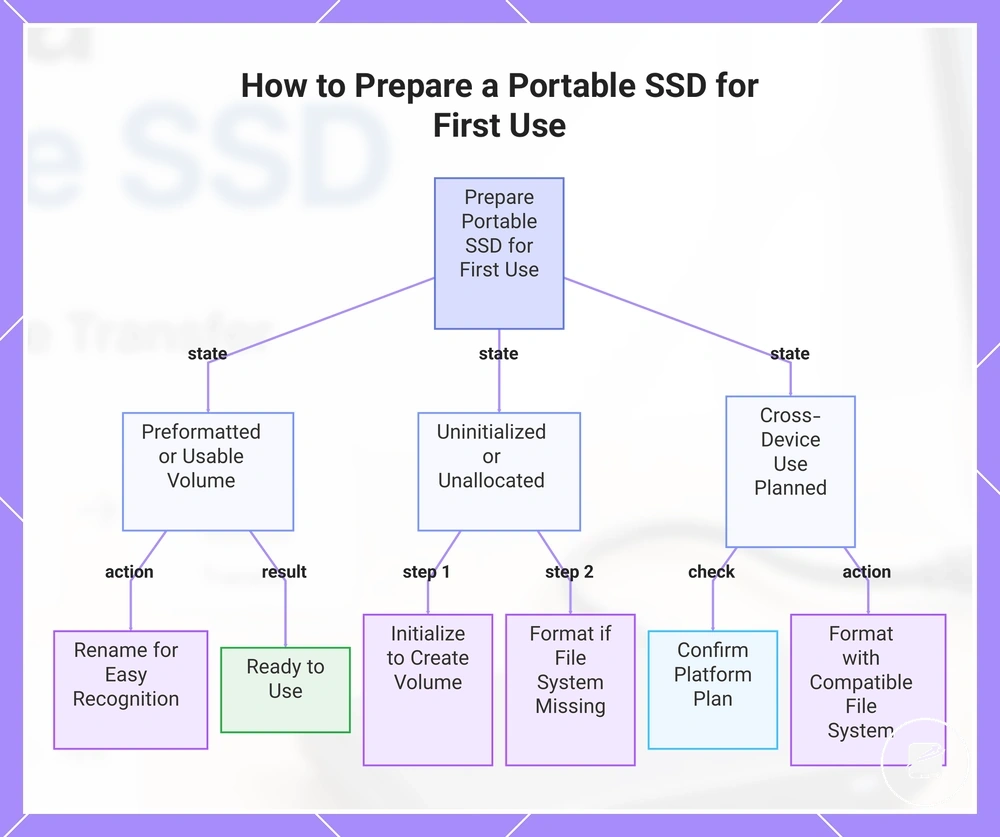
Prepare the portable SSD according to its current state before saving files. A preformatted drive is usually ready to use, an uninitialized drive requires initialization before storage can be created, and a drive intended for Windows, Mac, and other devices may require a different file system for your planned cross-device use. Preparation for first use depends on the drive state rather than requiring formatting in every case.
Prepare the portable SSD according to its current state before saving files.
Assigning a clear drive name helps you identify the correct volume more easily during everyday use. If the portable SSD already contains a usable volume, renaming it improves recognition without changing existing data. If the operating system reports the drive as uninitialized or unallocated, initialization is the preparation step that makes usable storage possible.
- Identify the current state. Confirm whether the portable SSD is preformatted, uninitialized, encrypted, or already contains a usable volume before making changes.
- Set a drive name. Give the volume a descriptive name so it is easier to recognize and select in Windows, Mac, and supported devices.
- Initialize when required. If the operating system identifies the drive as uninitialized, complete initialization so a usable storage volume can be created.
- Format only when needed. Apply formatting only if the drive has no usable file system, if you require a different file system, or if you are preparing the drive for a specific Windows, Mac, or cross-device workflow.
- Confirm your platform plan. If the external SSD will be shared across multiple operating systems, choose a file system that supports that intended cross-device use instead of assuming one format is suitable for every device.
For example, a new portable SSD that already appears with a usable volume may only need a drive name before files are copied. By contrast, an uninitialized drive must first be initialized, and a drive prepared for one operating system may require a different file system before it is suitable for regular cross-device use.
This chart shows the preparation steps based on the drive's current state: preformatted, uninitialized, or requiring a different file system for cross-device use.
Naming the drive for easier recognition
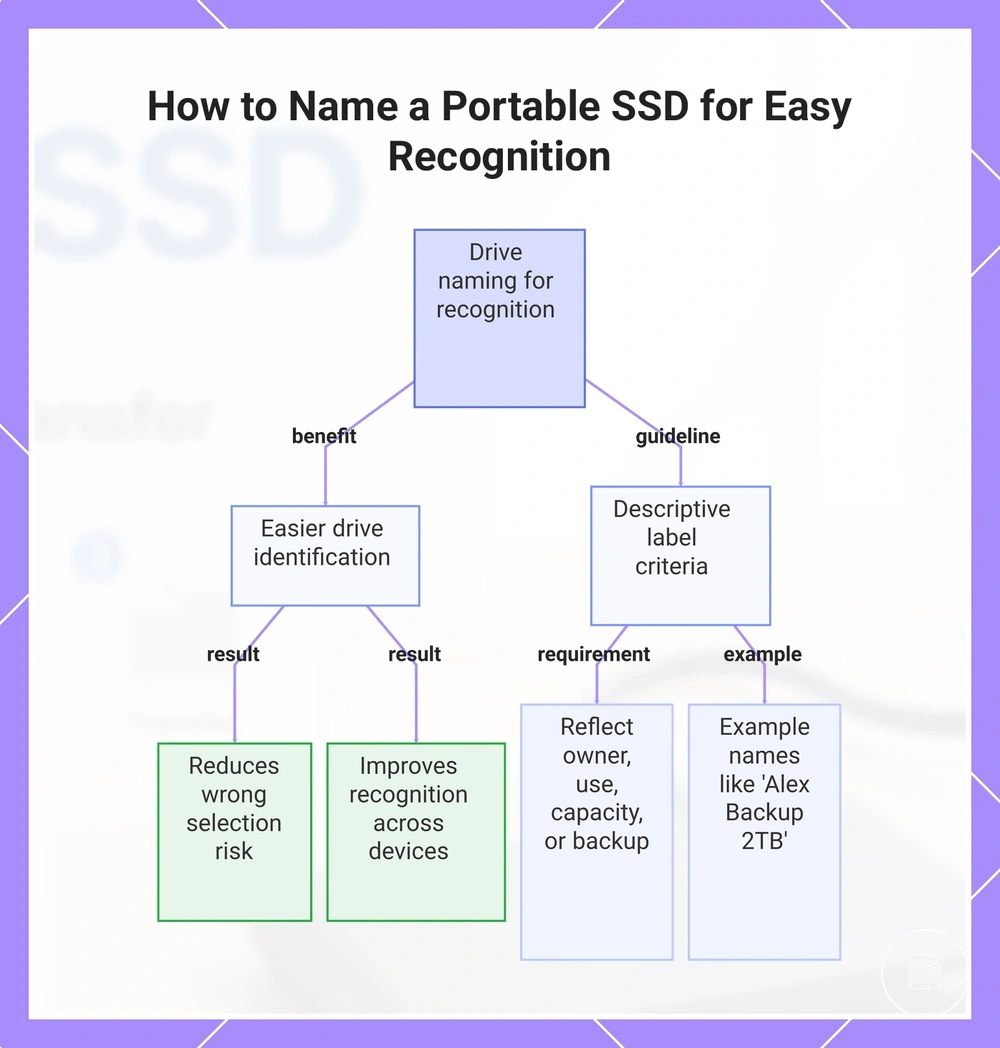
A clear drive name helps you identify the correct portable SSD the first time you connect it, especially when more than one external storage device is available. A descriptive label makes selection easier for copying, restoring, or backing up files and reduces the risk of choosing the wrong storage location or deleting data from the wrong drive. Naming the drive is an optional organization aid that improves recognition without changing how the portable SSD stores data.
If you use multiple external drives, choose a label that reflects the owner , use , capacity , or backup purpose.
If you use multiple external drives, choose a label that reflects the owner, use, capacity, or backup purpose. For example, names such as "Alex Backup 2TB," "Photo Archive 1TB," "Work Projects," or "Travel Storage" make storage devices easier to distinguish across connected devices, although the displayed volume name can differ slightly between operating systems.
- Owner: Alex SSD
- Use: Video Projects
- Capacity: Portable SSD 2TB
- Backup: Weekly Backup
This chart shows the benefits of naming a portable SSD and the guidelines for choosing a descriptive label to avoid selecting the wrong drive.
When initialization or formatting is needed
Initialization or formatting is needed only when the portable SSD is unallocated, unreadable, or uses a file system that does not suit the intended device mix. A readable, preformatted drive usually needs no change before first use. The decision should match the drive state with Windows-only, Mac-only, or cross-device use.
A readable, preformatted drive usually needs no change before first use.
Microsoft Support identifies initialization, volume creation, and formatting as separate disk-management actions, while Apple Support identifies APFS as a macOS file system and exFAT as compatible with Windows. NTFS is the default file system for modern Windows systems, according to Microsoft Learn.
| Drive state | Device use | Likely action | Risk note |
|---|---|---|---|
| Unallocated | Windows, Mac, or cross-device | Initialize the drive, create a volume, and choose a suitable file system. | The drive does not provide usable storage until a volume is created and formatted. |
| Preformatted with NTFS | Windows only | Keep NTFS when the drive is readable and intended for Windows use. | Reformatting creates a data-erasure risk for files already on the volume. |
| Preformatted with APFS | Mac only | Keep APFS when the drive is readable and intended for Mac use. | APFS is not the cross-device choice identified by Apple for Windows compatibility. |
| Preformatted with exFAT | Windows and Mac | Keep exFAT when both operating systems need to use the drive. | Formatting is unnecessary unless the existing file system no longer suits the device mix. |
For a fuller explanation of file-system choices, see formatting a portable SSD. Formatting can erase the selected volume, so copy any files you need to keep before changing its format.
Moving Files With a Portable SSD
Begin the file transfer after the portable SSD is recognized by File Explorer or Finder and the destination folder is accessible. Use copy to keep the original files on your computer, move to relocate them to the portable SSD, and a backup folder when you want an additional stored copy. The choice determines whether files are preserved, relocated, or duplicated.
The choice determines whether files are preserved, relocated, or duplicated.
Documents, photos, and other folders can be transferred with copy-and-paste or drag-and-drop. For example, you might copy family photos to a portable SSD while leaving the originals on your computer, or move large project documents to external storage to free local disk space.
| Action | What happens | Use when |
|---|---|---|
| Copy | Files remain on the computer and a second copy is created on the portable SSD. | You want preserved files in both locations. |
| Move | Files are relocated to the portable SSD after the transfer completes. | You want the portable SSD to become the primary storage location. |
| Backup folder | Additional copies are stored in a dedicated folder on the portable SSD. | You want an extra copy without replacing the original files. |
- Open the folder containing the documents, photos, or other files you want to transfer.
- Open the portable SSD and choose or create the destination folder.
- Select the files, then use copy-and-paste or drag-and-drop according to whether you want to copy or move them.
- If creating an additional copy, place the files in a clearly named backup folder.
- Wait for transfer completion, confirm the files appear in the destination, and eject the portable SSD before disconnecting it.
Do not disconnect the portable SSD while a file transfer is in progress because an interruption can leave copied or moved files incomplete. Transfer time can differ according to file size, the number of files, the computer, and the connection, so rely on the operating system's completion indicator before ejecting the drive.
Copying files without interrupting transfer
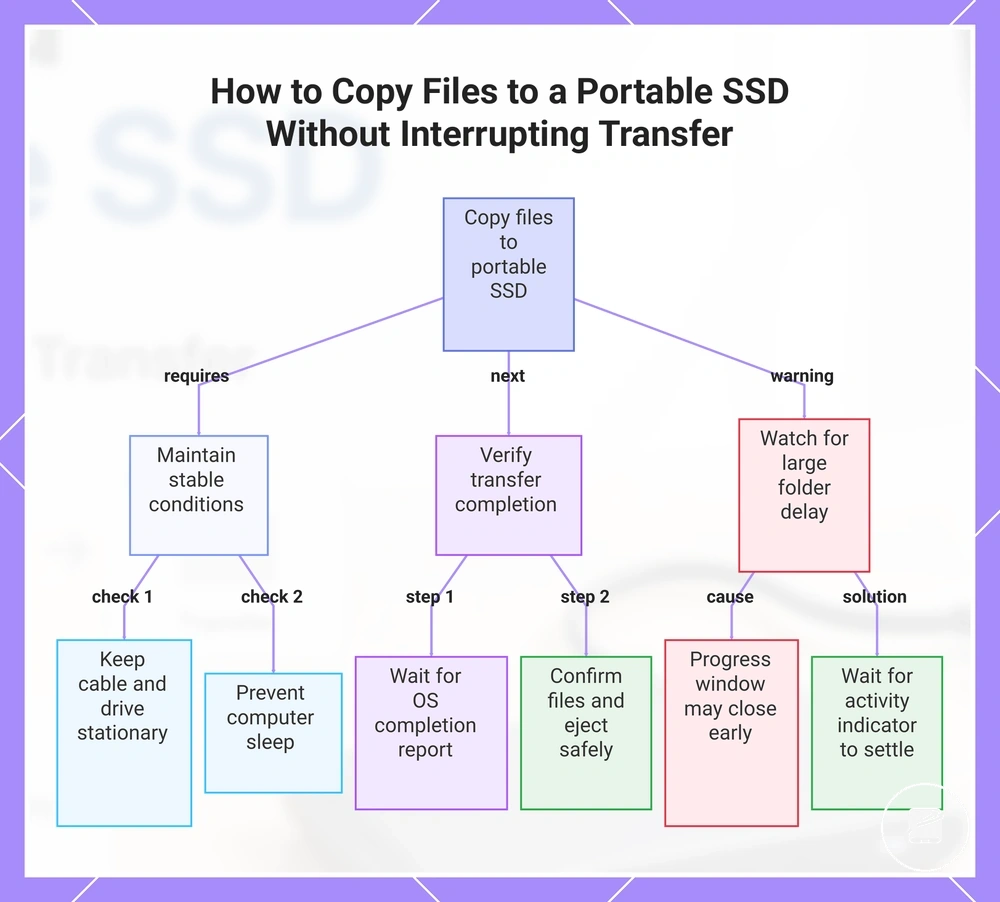
Keep the portable SSD connected and the computer awake until the copy progress indicator shows completion. Stable cable placement and an active system state reduce interruption risk, while transfer completion is the key signal that copying has finished.
- Start the copy and confirm that the destination folder appears on the portable SSD; the visible cue is an active transfer window or progress indicator.
- Keep the cable and portable SSD stationary while progress continues; the visible cue is uninterrupted progress without connection warnings or the drive disappearing.
- Prevent sleep mode until the transfer finishes; the visible cue is that the computer remains awake and the progress indicator continues to update.
- Wait until the operating system reports completion and the copy window closes; the visible cue is that no transfer task remains active.
- Confirm the copied files appear in the destination, then eject the portable SSD before unplugging it; the visible cue is the operating system's safe-removal confirmation.
Large folders can appear finished before background write activity has fully stopped, particularly when they contain many files. For example, after the progress window closes, wait until the portable SSD's activity indicator settles, where available, and confirm that the destination folder opens normally before ejecting the drive.
Large folders can appear finished before background write activity has fully stopped, particularly when they contain many files.
This chart shows the key steps and checks for copying files to a portable SSD without interruption, including conditions to maintain during transfer, verification after completion, and a warning about large folder delays.
Organizing folders for storage or backup
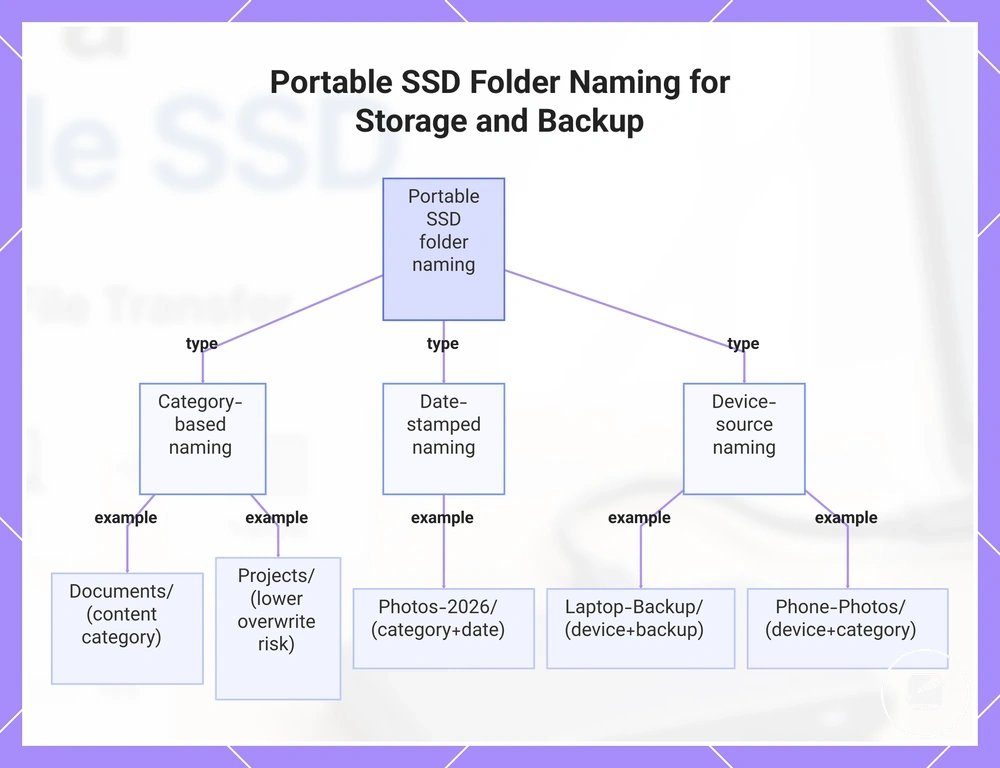
A simple folder structure keeps a portable SSD practical after the first file transfer. Use folder names that identify the category, date, device source, or backup purpose so retrieval is easier and the overwrite risk is lower.
For regular storage, organize folders by content category.
For regular storage, organize folders by content category. For simple backup use, include the device source and backup label in the folder name so stored files and backup copies remain distinct.
- Documents/ – Groups files by category for faster retrieval.
- Photos-2026/ – Adds a date so newer and older folders are easier to distinguish.
- Laptop-Backup/ – Identifies both the device source and the backup category.
- Phone-Photos/ – Separates files by device source to reduce file-selection errors.
- Projects/ – Keeps active work in a dedicated storage category, lowering overwrite risk when updated files are copied.
This chart shows the main folder naming conventions for organizing files on a portable SSD, including category-based, date-stamped, and device-source approaches.
Safe Use After Setup
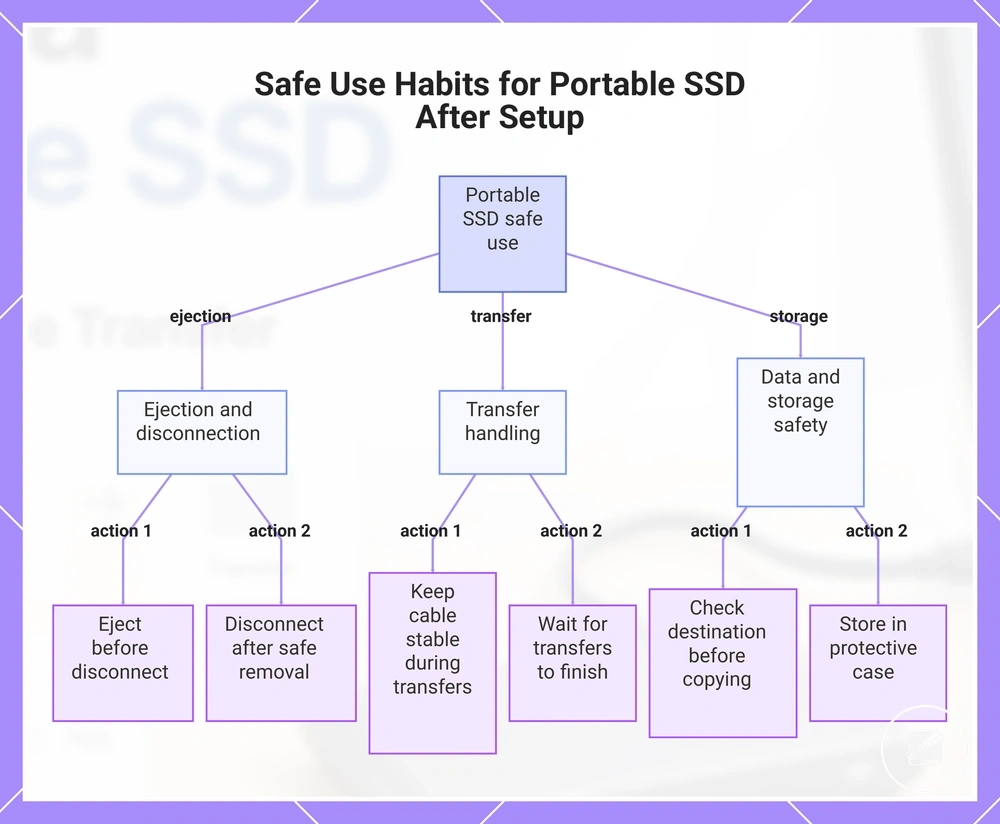
Safe use after setup helps keep a portable SSD reliable and reduces the risk of file corruption, data loss, or physical damage during everyday use. Eject the drive before you disconnect it, keep the cable stable during transfers, and store the SSD carefully so both the data and the drive are handled safely.
- Eject the portable SSD before you disconnect it to reduce the risk of interrupting pending write activity and corrupting files.
- Keep the cable secure during file transfers to reduce transfer interruption caused by accidental movement or disconnection.
- Wait until all file transfers finish before you unplug the drive to lower the risk of incomplete copies or data corruption.
- Store the portable SSD in a protective case or another secure location to improve physical protection against impacts, dust, and everyday handling.
- Check the destination before copying, moving, or deleting files to reduce overwrite risk during routine data handling.
- Disconnect the drive only after safe removal completes so the operating system has finished any remaining storage activity.
These safe use habits reduce common handling risks after setup without replacing broader data-protection practices. Careful ejection, stable cable handling, appropriate storage, and thoughtful data handling help keep the portable SSD dependable during normal use.
Sensitive files may require broader protection than basic handling alone.
Sensitive files may require broader protection than basic handling alone. For guidance beyond these post-setup practices, see portable SSD data safety.
For guidance beyond these post-setup practices, see portable SSD data safety .
This chart shows the key safe use practices for a portable SSD after initial setup, including ejection, transfer handling, and storage habits.
Ejecting the drive before disconnecting it
Eject the portable SSD before you disconnect it to reduce the risk of interrupting unfinished write activity. Wait until file transfers are complete, then unplug the drive only after the operating system confirms it is safe to remove.
Windows
- Select the Safely Remove Hardware and Eject Media icon in the system tray.
- Choose the portable SSD and wait for the Safe to Remove Hardware confirmation before you disconnect it.
macOS
- Open Finder and select the eject icon next to the portable SSD.
- Wait until the drive disappears from Finder, then disconnect it.
If the operating system does not confirm that the drive is safe to remove, leave it connected until any remaining write activity or open files have finished. Safe ejection reduces the corruption risk associated with interrupted transfers, but it does not prevent every form of data loss.
Keeping the drive, cable, and case together
A portable SSD is harder to reconnect when its matched cable, adapter, or case is stored separately. Keeping the complete setup kit together makes the correct accessories easier to recognise and supports faster future setup.
- Store the drive with its matched cable so the correct connector is available for reconnection.
- Keep any required adapter with the cable so a compatible connection option remains part of the setup kit.
- Place the drive, cable, and adapter in the same case or pouch to reduce the risk of misplacing a setup-support accessory.
- Use a clean, dry storage location to reduce the chance of debris or moisture affecting the drive and its connectors.
- Coil the cable loosely inside the case to reduce strain and lower the damage risk during storage.
First-Time Setup Problems and Mistakes
First-time setup problems are easier to diagnose when the symptom is grouped before changing settings or accessories. Common first-use issue groups include a drive not appearing, a wrong cable, an uninitialized drive, an interrupted transfer, and an unsafe disconnect.
First-time setup problems are easier to diagnose when the symptom is grouped before changing settings or accessories.
Use the symptom as the starting point, apply the likely first check, and move to the next check only when the result is unchanged.
| Problem | Likely first check | What to avoid | Next step |
|---|---|---|---|
| Drive not appearing | Check that the cable is fully connected and test another compatible USB port. | Assuming the portable SSD has failed before checking the connection. | Check whether the operating system detects the drive. |
| Wrong cable | Confirm that the cable supports data transfer and matches the drive connector. | Changing the cable, adapter, and port at the same time. | Reconnect with the matched cable and check recognition again. |
| Uninitialized drive | Check whether the operating system lists the drive as uninitialized or without a usable volume. | Formatting before confirming whether the drive contains needed data. | Review the drive state before continuing setup. |
| Interrupted transfer | Check whether the copied files are complete and accessible. | Restarting the transfer without checking the destination files. | Repeat only the incomplete transfer after the connection is stable. |
| Unsafe disconnect | Reconnect the drive and check whether it is recognised normally. | Disconnecting again while transfer or write activity is in progress. | Eject the drive safely after activity has finished. |
Compatibility-related mistakes are more likely when the port, adapter, or cable does not provide a matching data connection. Change one connection component at a time so each result shows whether the recognition issue is linked to that component.
Change one connection component at a time so each result shows whether the recognition issue is linked to that component.
If the setup problem remains after these checks, continue with the dedicated portable SSD not showing up guide rather than beginning recovery or full operating-system troubleshooting. A replacement data cable or compatible adapter is optional support only when the existing accessory is identified as the likely cause.
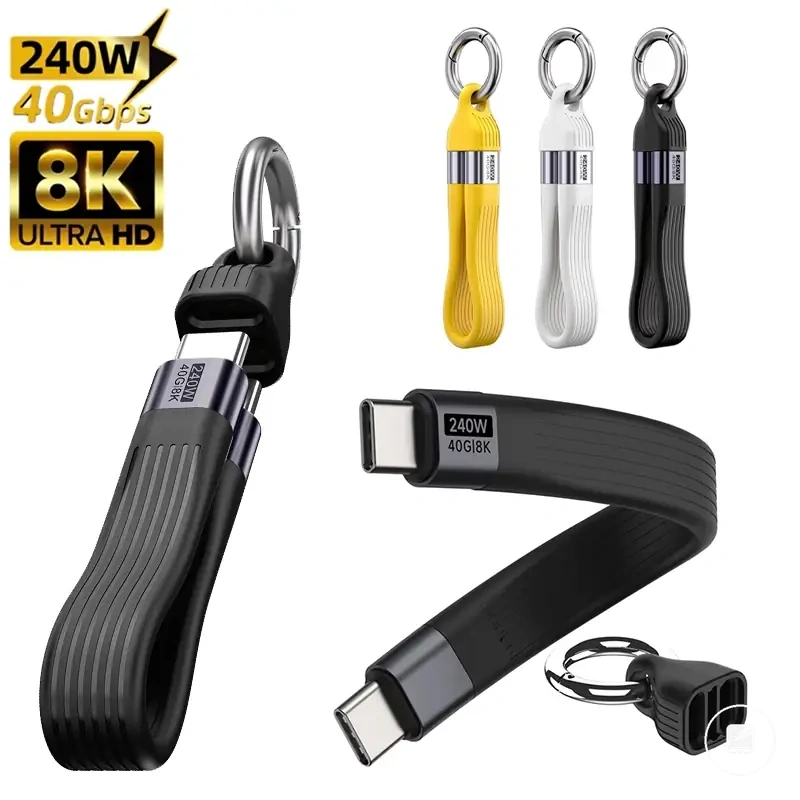
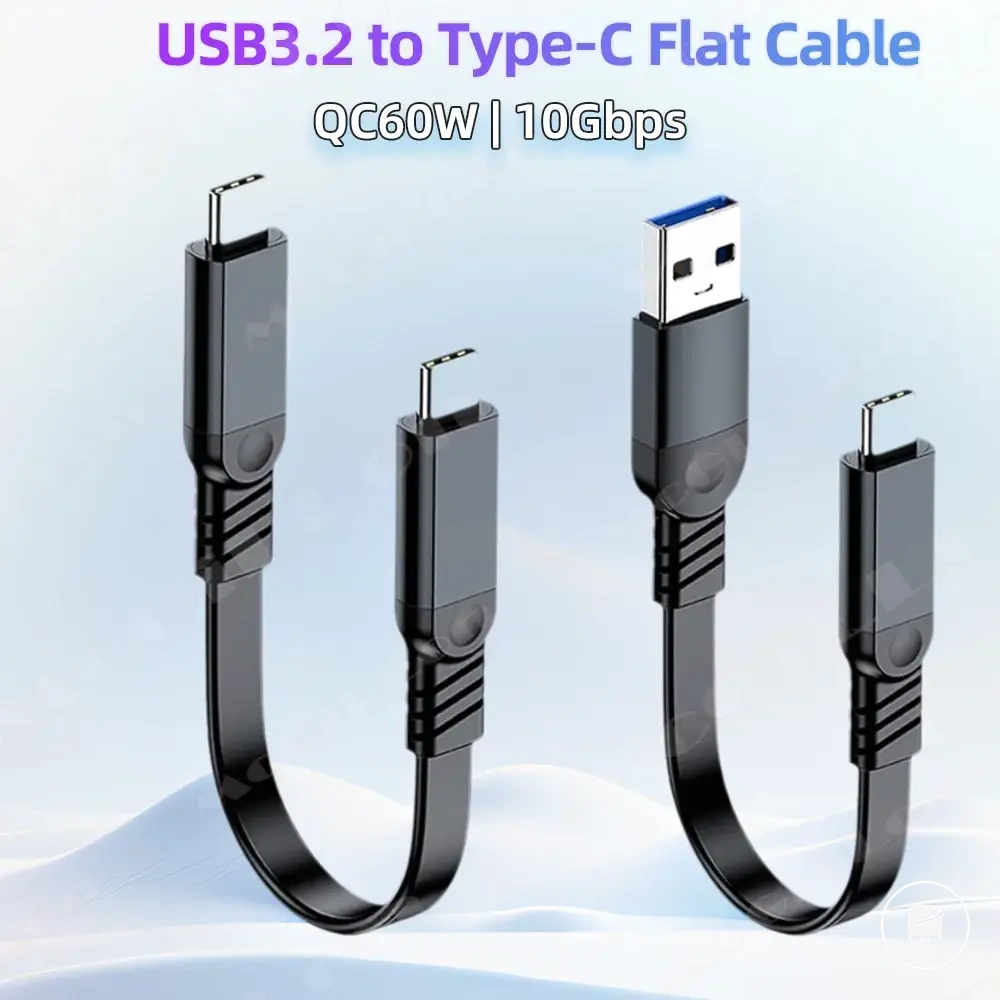
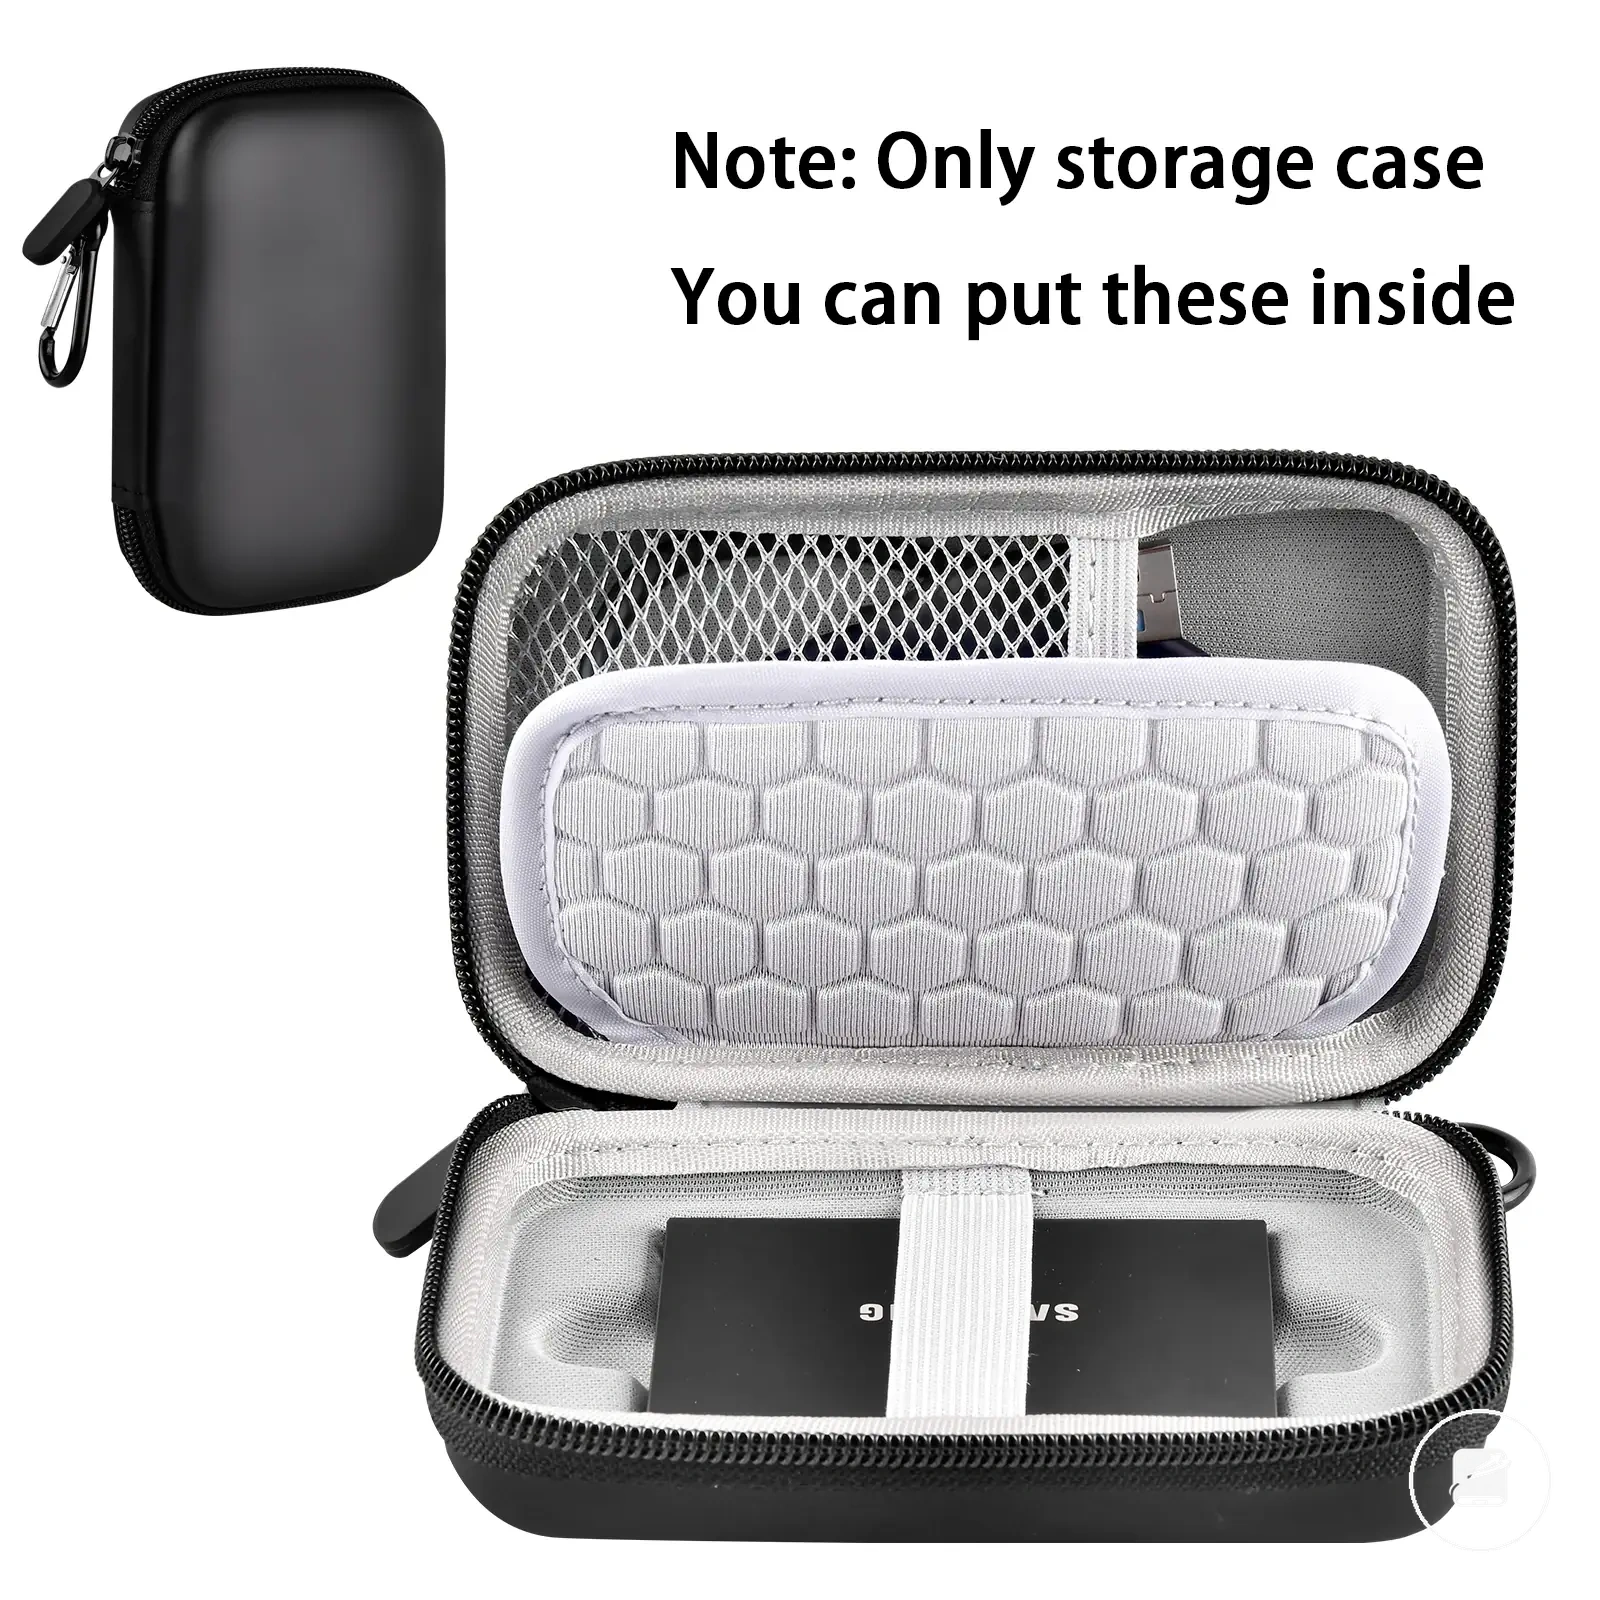
Here are product examples that may make comparison easier.
Here are product examples that may make comparison easier. Before buying, always review the compatibility criteria, essential features, and product details.


Cable, port, and recognition issues
Recognition issues immediately after connecting a portable SSD are usually narrowed by checking the cable, port, adapter, and OS visibility before changing other settings. The main visibility signals are whether the drive appears in disk utilities or whether it is not appearing anywhere in the operating system.
If the drive is not appearing anywhere, begin by checking the cable, port, adapter, or hub before moving to broader troubleshooting.
If the drive appears in disk utilities but not in File Explorer or Finder, the operating system has detected the drive even though it is not yet available for normal file access. If the drive is not appearing anywhere, begin by checking the cable, port, adapter, or hub before moving to broader troubleshooting. For example, reconnecting the drive directly to a computer instead of through a USB hub can help determine whether the hub is the likely source of the recognition issue.
| Symptom | Likely attribute issue | Check | What it means |
|---|---|---|---|
| Drive not appearing | Loose cable or inactive port | Reconnect the cable securely and test another compatible USB port. | If the drive is still not appearing anywhere, continue with broader diagnosis instead of assuming a hardware fault. |
| Recognition is inconsistent | Incompatible adapter or weak hub | Connect the drive directly to the computer without the adapter or hub when possible. | If recognition becomes stable, the adapter or hub is the likely first component to investigate. |
| Drive appears in disk utilities only | OS visibility state | Confirm that the drive is listed in the operating system's disk utilities. | The computer has detected the drive, so the next checks should focus on its current drive state rather than the physical connection. |
| Drive not listed anywhere | Connection path | Test the cable, port, adapter, and hub one component at a time. | If none of these checks changes the result, further troubleshooting is appropriate because the operating system is not detecting the drive. |
Interrupted transfers and unsafe disconnection
An interrupted transfer or unsafe disconnection can leave write activity unfinished, increasing the risk of incomplete files or warning messages when the portable SSD is used again. Common interruption conditions include unplugging the drive too early, system sleep, cable movement, or a forced shutdown before write activity has finished.
If a transfer error occurs, recheck the copied files before assuming they were written successfully.
If a transfer error occurs, recheck the copied files before assuming they were written successfully. For example, if a large file transfer stops after cable movement, reconnect the drive, confirm it is recognised, and verify that the expected files are present and open normally. Serious errors, missing data, or repeated transfer failures require a data-safety path beyond first-time setup rather than repeated recovery attempts.
Recovery checklist:
- Reconnect the portable SSD and confirm that it is recognised by the operating system.
- Recheck whether the interrupted files are complete and open without warning messages.
- Repeat only the interrupted transfer after confirming the cable connection is stable and write activity has stopped.
- Review any operating system warning messages before continuing with additional file transfers.
- If repeated failures or missing data continue after these rechecks, stop further write activity and follow a data-safety process instead of attempting repeated transfers.